"Painted"Cake - Che Nom's Jelita Cake
- bakingjosie1
- May 30, 2022
- 3 min read
Updated: Nov 14, 2022
"Jelita" means "Beautiful" or "Charming" in the Malay language. I'm pretty happy with the result of my first Jelita Cake. This cake is a super soft and fluffy butter cake. It's a very fun cake to make because you will never know exactly how the "painting" on the cake will look like until it is out of the oven!
I baked the cake at 150C for 10 mins and then 1hr 20 mins at 140C. The recipe's instruction was to bake for 1 hour after the initial 10 mins. However, my baking tin was smaller and the height of my cake was taller so it took 20 mins more to fully cook. I would however reduce the sugar to 140g as I found the cake a little too sweet for my taste.
Recipe from Che Nom. The video is in Malay so I've translated it to English below.
Ingredients:
5 eggs
220 g self raising flour
170 g caster sugar (I would recommend 140 g)
60 ml full cream milk
1 teaspoon vanilla extract
1 tablespoon ovalette
150g salted butter, melted and cool till warm
**If using unsalted butter, please add 1/4 teaspoon salt and sift together with self-raising flour
Line a 8 x 8" square baking tin with baking paper, folding the edges of the paper over the tops of the tin.
Sift flour.
In bowl of stand mixer fitted with a whisk attachment, whisk eggs, sugar, sifted flour, milk, vanilla & ovalette together for 12-15 mins till thick and pale and mixture has tripled in volume. The height of the cake is dependent on how long you whip the cake. Make sure to beat a full 12-15 mins!
On low speed, pour in melted butter a little at a time and mix well after each addition. Whisk for 2-3 mins more after the last addition. Scrape bowl to make sure that the butter is fully incorporated into the mixture.
Separate a few tablespoons of the mixture into small bowls and add food coloring that you will be using to "paint" your cake with. Transfer to piping bags.
Preheat your oven to 150C.
Pour the rest of the cake mixture into the prepared baking tin.
Paint your cake with the colored batter. You may make swirls with toothpicks or skewers.
In the lowest rack of your oven, bake cake at 150C for 10 mins. Lower temperature of oven to 140C and bake for another 1 hour (in my case, 1 hour and 20 mins) until cake is tested done. You may cover your cake with some foil if the cake is browning too quickly for the last 10 - 20 mins of the baking. Try to tent the foil without touching the cake itself.
Remove from oven. After 3 - 4 mins, flip cake over on a rack to cool for 15 mins, painted side down. Remove baking paper from cake. Leave cake on rack for 5-10 mins so that the top of the cake is indented with the square pattern of the cake rack. Turn cake over onto a cake board and cool completely before cutting and serving. You may trim the sides of the cakes (if using a square baking tin) for a neater looking cake.
Note:
What is ovalette? Ovalette is a stabiliser used in baking sponge cakes. It helps the eggs to rise rapidly and stiffly. As it is acidic it also helps the beaten eggs to remain stable and not lose the airy and voluminous texture. It makes sponge cake softer and smoother. It can also be known as cake gel, sponge cake (SP) emulsifiers or quick gel.
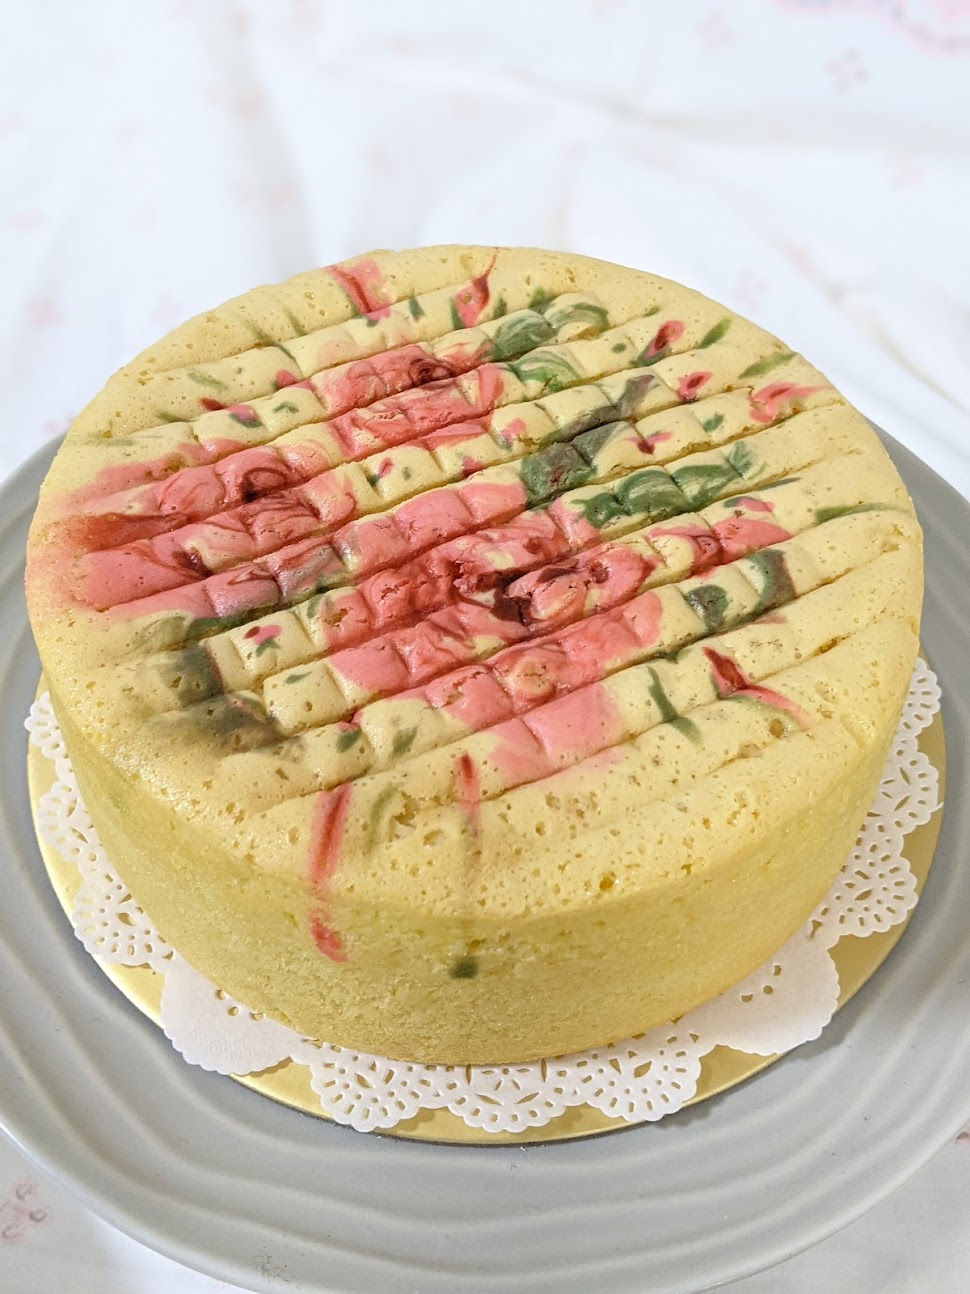
The "roses" turned out better than I thought they would!

The cake is super fluffy and moist too! Yum!

After painting my design & before it went into the oven


Comments